A simple way to do object detection on an image using TensorFlow object detection API. Google have released new Object detection API that runs on TensorFlow 2.
Introduction
General steps for object detection: 1. Collect and Labeling data 2. Installation of training library 3. Selecting and training models
Transfer Learning
In practice to train a model, large amounts of labeled data are required which is not always possible. So we train a network on huge public data- sets. Using this as the starting point we then train the network on our custom data. The assumption here is that model will learn to recognize patterns from the larger data-sets and help in better convergence on our small data-sets. Generally the libraries provide the pre-trained models and we take it up from there.

1. Collecting and labelling Data
While collecting data care should be take to cover a variety of lighting conditions such as day,night,cloudy,.. etc. This make for robust model down the line. After collection it is a good idea to randomize the names of the images. This will help us directly work with them without worrying about shuffling the data and labels.
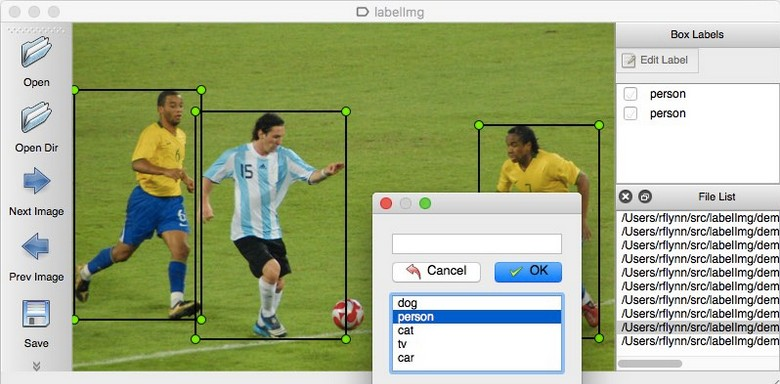
Tip: A,D are shortcut keys for prev,next images. R for bringing up the rectangle labeling tool.
LabelImg is a popular tool for labeling data-sets and can be installed by pip install labelImg in the system. After installation navigate to the data folder and start labeling. Draw a box around the interested objects and give the their name. This will create XML files with labels for each image in the selected directory. Now we have the labeled data, we split them into training and testing directories. The ratio to which this should be done mainly depends on the size of the data-set 80/20 is generally recommended.
Tip: A,D are shortcut keys for prev,next images. R for bringing up the rectangle labeling tool.
.2. Installation of training libraries
NVIDIA drivers are required for training a neural network. For Ubuntu in software and updates, go to Ubuntu software and change download from to ‘Main Server’, then in additional drivers select version 435(I have tested on this driver). Download and install cuda10.0 and add the path to .bashrc
export PATH=/usr/local/cuda-10.0/bin${PATH:+:${PATH}} export LD_LIBRARY_PATH=/usr/local/cuda-10.0/lib64${LD_LIBRARY_PATH:+:${LD_LIBRARY_PATH}}
Then register onto Nvidia developers and download the cuDNN library and follow the installation process. A compatibility matrix for different versions can be found here.
- or TensorFlow, pip install — upgrade tensorflow-gpu
- for Detectron2, go to pytorch.org and select your setting and install pytorch 1.4.
(tested on GCC 5.6)
In-depth Documentation for the above libraries is available at
Installation - TensorFlow 2 Object Detection API tutorial documentation
Although having Anaconda is not a requirement in order to install and use TensorFlow, I suggest doing so, due to it's…
tensorflow-object-detection-api-tutorial.readthedocs.ioInstallation - detectron2 0.2.1 documentation
Edit description
detectron2.readthedocs.io3. Selecting and training models

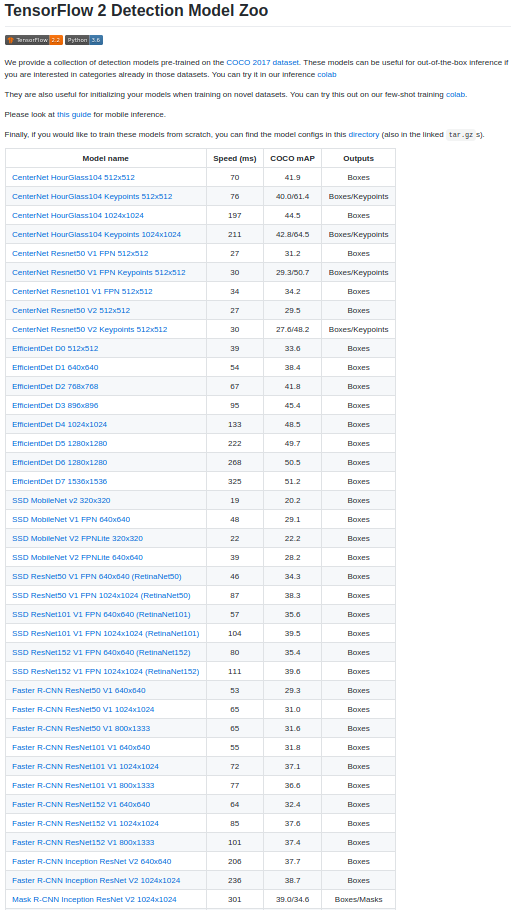
TensorFlow provides many model for detection, and i have chosen efficientdet_d0 to train as the final model size is small and easy to share the final trained weights (easy downloads,uploads). So we download the weights of efficientdet_d0. Along with this we need few files from my github repo, these are
- generate_tfrecord.py — Convert XML to TF Record.(From Docs ) labelmap.pbtxt — Contains label FIRE
- pipeline.config — Contains structure for training such as No.of classes,learning
rate,batch size...etc
Now we generate the Tf records from the XML file and start training. Documentation suggests to reach a loss of 1 before termination but as the the data-set is quite small loss starts at 0.6 and plateaus at 0.2 after 6300 steps. Now after terminating the training we export the model which is used for inference.
We define a detection function that loads the model into memory .This trained model weights are also in my Github repo along with the test images . To this function we provide a list of paths to the images we would like to infer and then visualize the output.
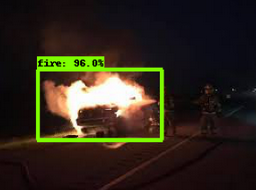
Output
The inference part of the code loads the weights, and if the detection confidence is grater than 0.5 draws a bounding box. A statement will be printed saying ‘Fire’ or ‘No Fire’ which can be used as a trigger for the alerting system. Model pruning and quantization can further increase the inference speed.